A common feature of forms is an HTML Select/Option element which allows a quick and convenient dropdown list to select single or multiple options. Such dropdowns also offer faster and improved selection in mobile mode, where the options are at the bottom of the mobile device for quicker selection in what would otherwise be a more cumbersome dropdown experience. The option tags' ease of use and ubiquitous nature makes them a vital HTML element within forms, and it is this accessibility which also makes dynamically adding options from the Webflow CMS desirable.
A typical application of a Webflow CMS populated Select would be any scenario where you must offer a choice in a form, such as services, product variations, team members, dates or any other Collection-based listings. Unfortunately, automatically adding dynamic options to a Webflow Select element is not a native feature of the Webflow system. Still, it is possible with a simple tried and tested Webflow hack that breaks down the logic of the Select and incorporates a Webflow Collection to provide the desired dynamic option menu result.
Example Dynamic CMS Option Select in Webflow
The following Dynamic CMS Option Select example pulls Slick Media Blog Posts from the respective Collection. The Select is modified into a Jump Menu to make it more usable in this demo format. This previously popular but now discredited navigational form will open the selected post in the dropdown in a new window.
How to create a Dynamic CMS Option Select in Webflow
If you drag a Select into a Webflow Form from the '+ Add' Menu, inspect the Select tag in Google Chrome's Developer Tools (right-click and 'Inspect' in Chrome or a Chromium Browser like Wavebox); the default format is as follows: -
Breaking this down, the essential components of the tag are the' id' and 'name' (which should be the same), the 'data-name' for the Form entry, the 'w-select' class (to maintain Webflow styling) and then the option values. As Webflow does not permit these options to be added dynamically from the CMS, then using the logic above, we can bring this together by adding three Webflow elements one after the other within the form: -
1. A Webflow HTML Embed containing the Select tags non-dynamic attributes: -
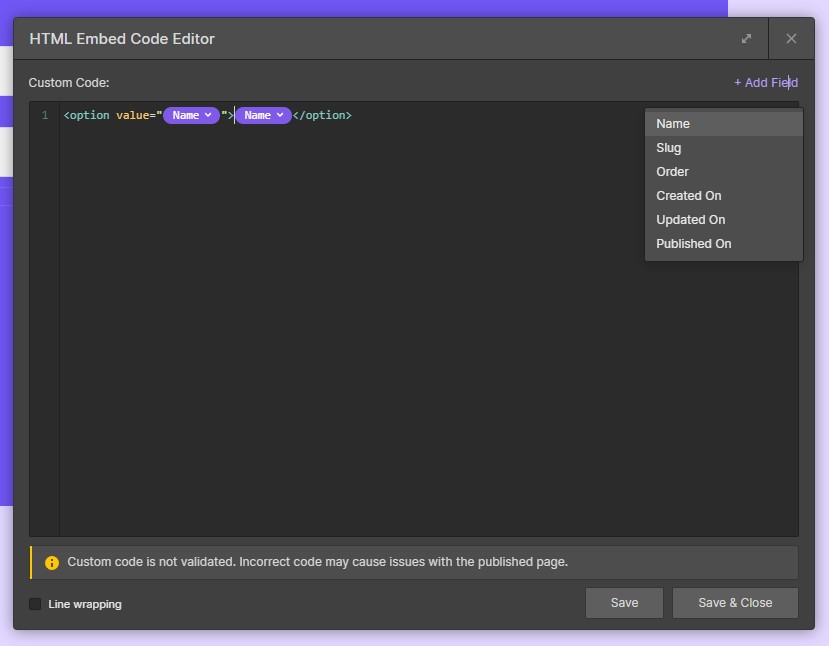
2. A Webflow Collection containing the options added via the CMS Collection List element. Once the Collection is that of the desired choices, add an HTML Embed into the Collection Items containing the code for the dynamic options: -

The 'Name' is the dynamic field 'Name' provided by the Webflow CMS, and this will give the value and the text for the Select options. If you don't want the name and values to be the same, then create a new 'Plain text' Custom Field in the Webflow CMS and replace it as necessary.
3. A Webflow HTML Embed to complete and validate the Select HTML: -
If you want to add your non-dynamic options, add additional HTML options in the HTML embed before or after the Collection. For example: - <option value="Additional Choice">Additional Choice</option>
How it works
The Webflow Dynamic CMS Select works without breaking the Webflow Websites code/layout because a Select does not include additional structured HTML code beyond the Options. So the erroneous Webflow Collection divs are filtered out within the opening '<select>' and closing </select>'.
Let us know if the comments if you find this approach to creating a Webflow Dynamic CMS Select useful.


Join in the Discussion