

When permanently changing your website address, renaming a page, or moving it, using a 301 Redirect is crucial. When a browser or search engine encounters a 301 status code, this powerful tool transfers the link equity (ranking power) from the old URL to the new one. The 301 redirect, therefore, plays a crucial role in SEO, maintaining your website's search engine rankings and overall user experience.
While the ability to create 301 redirects in domain providers is common, it often requires more secure redirects with https:// over http://. However, this is a breeze with Cloudflare, even on the Free plan, with ten available rules at your disposal.
How to set up a 301 Redirect on Cloudflare
To set up a 301 redirect from one domain to another using Cloudflare’s Redirect Rules, follow these steps:
Log in to Cloudflare:
- Go to the Cloudflare website and log in to your Cloudflare Dashboard.
Select the Domain:
- Select the domain (i.e. olddomain.com) from the initial 'Home' or under 'Websites' in the main menu to which you want to set up the 301 redirect.
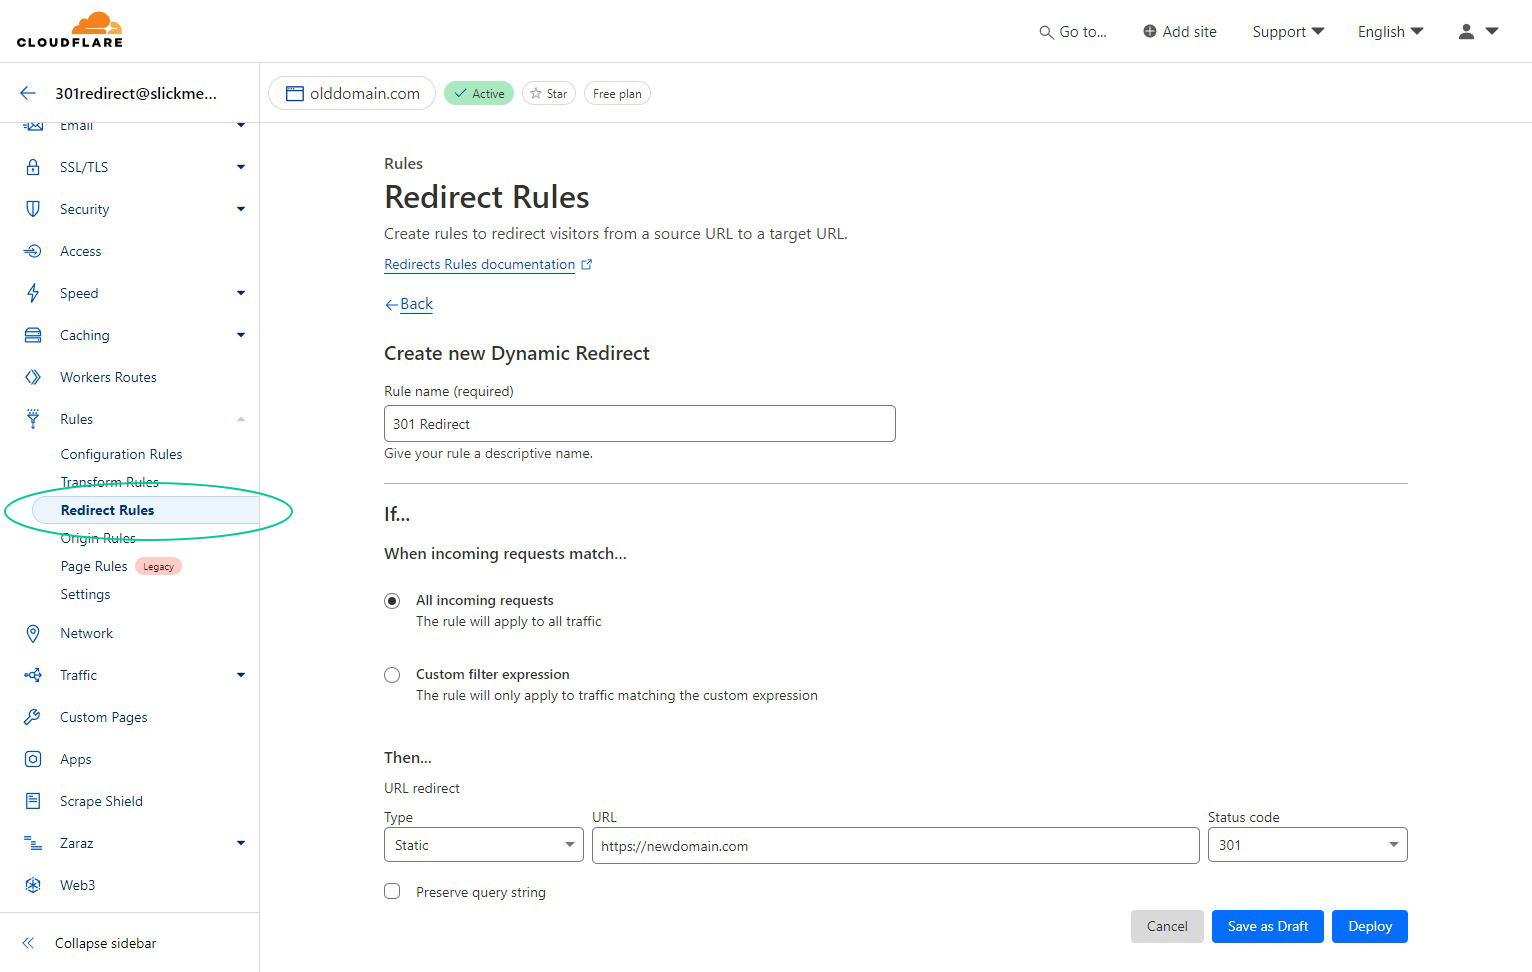
Select 'Rules' from the Menu
- Click on 'Redirect Rules' from the domain settings menu (left)
Create a New Redirect Rule
- Click on '+ Create Rule'
- Add a 'Rule name,' i.e. '301 Redirect'
Define the 301 Redirect Rule
Under 'If... When incoming requests match...'
- Select 'All incoming requests' to apply the rule to all traffic. You can also use 'Dynamic' expressions for more granular control, but you do not need them for this use case.
- Under 'Then...URL redirect', keep the dropdown as the initial 'Static'
- Keep the Status code as the initial '301.'
- Click the 'Deploy' or 'Save as Draft' to deploy the rule later.
These steps will now set a 301 Redirect https://olddomain.com to https://newdomain.com; however, if you have not done so already, it is recommended to activate all 'Basic Features', which includes 'Always Use HTTPS' (so http:// requests will redirect to https://). You can activate these via the 'Overview' menu under 'Quick Actions'.
Activate free Basic Features in Cloudflare
Activate 10 core speed and security features included in the Cloudflare Free Plan to activate 'Always Use HTTPS' and other great features to secure and speed up your Cloudflare Website/Service.
- In the Cloudflare Dashboard, click on 'Overview' in the main menu, and under 'Quick Actions', select the 'Activate' button on Basic Features and then click the 'Activate selections' button.
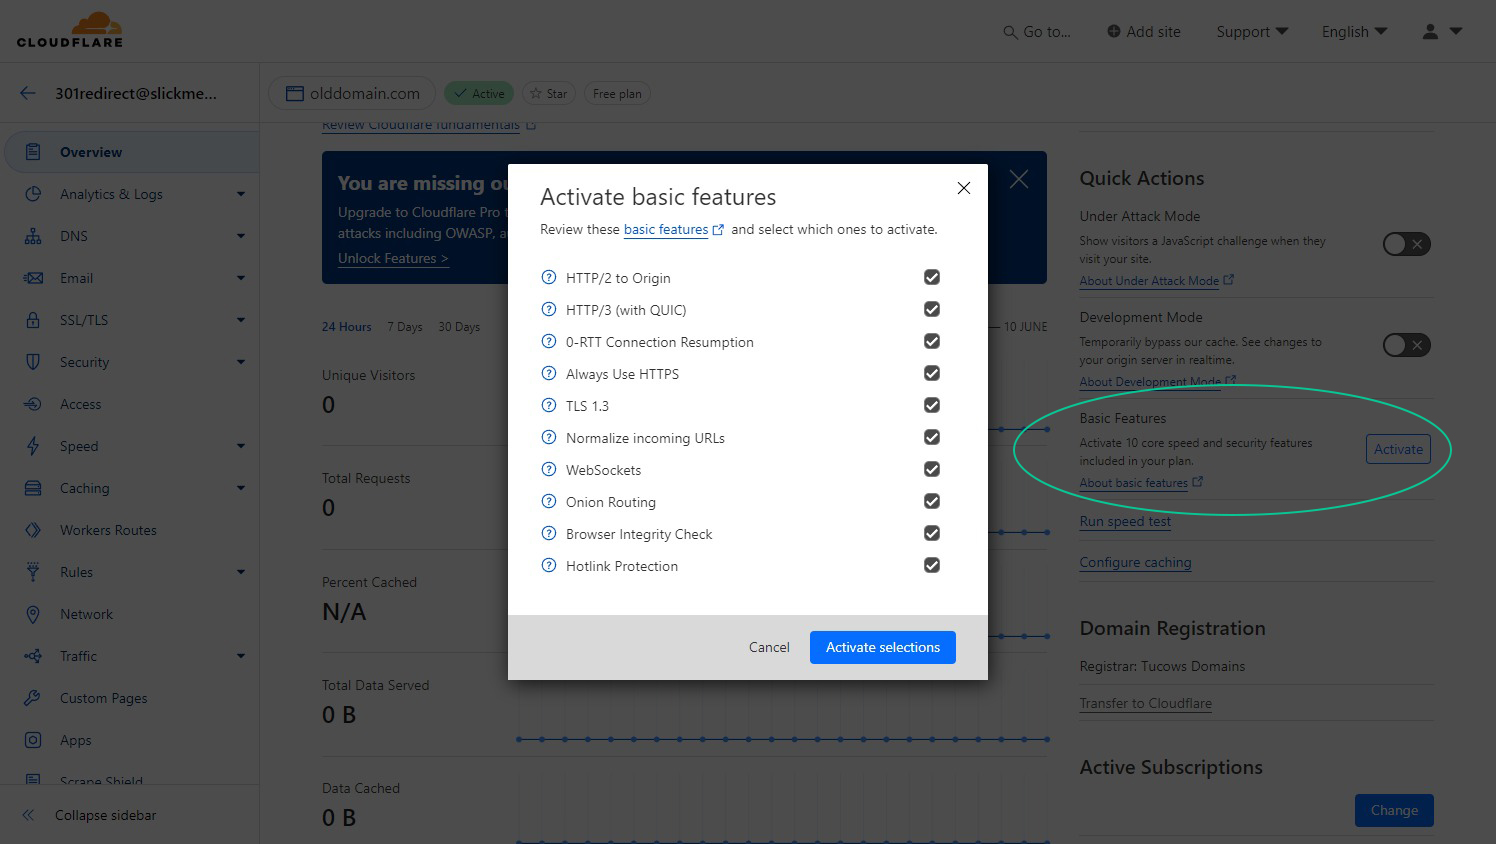
That's all you need to do to take advantage of Cloudflare's Free Basic Features, which would typically be payable services elsewhere.
301 Redirect not working in Cloudflare
Following the steps above should give you a secure https:// 301 redirect from one domain to another with Cloudflare. However, if this does not work or only partially, your Cloudflare setup for 301 Redirects may need resetting to the required defaults. These 'A Record' DNS setting defaults handle the web requests to a specified address/ IP address, and these settings will give you the Cloudflare redirect. When you set up a Cloudflare account, particularly on an existing domain with existing DNS Records, to port, Cloudflare will not add them by default.
The following DNS Records are required to redirect one domain to another in Cloudflare: -
If you have any old or conflicting A Records, remove them and ensure that your domain redirects correctly and resolves DNS queries.


Join in the Discussion